Monday, August 8, 2016

It's time to go back to school .....


.... well, it's almost time!  Can you believe it?  August is here and there are only a few short weeks before it will be time for the kids to head back to school.  My children are all grown and out of the house, but I do have grandchildren who, I know, are looking forward to school starting.  It will be fun to see those "first day of school" photos of my "babies" show up on my Facebook page.

September is also the time to start working on Christmas quilts for friends and family.  And if you're looking to have those quilts finished in time to wrap them up and put them under the tree, you want to make sure you get them in to be quilted before it's too late.

Please keep the following in mind:

  • There is a six to eight week turnaround on your quilt from the date you drop it off.  Quilts are completed on a "first in, first out" schedule as I no longer take reservations.
  • My last date to accept quilts for in time for Christmas gift giving is Wednesday, November 2nd.  I will be quilting up until Monday, December 12th so that I can ensure the last quilt can be picked up by Friday, December 16th.
  • I will not be quilting or making appointments for dropping off quilts from Monday, December 19th through Friday, January 6, 2017!
  For now, enjoy the rest of your summer and stay cool!!!!  I have plans to go to Michigan and visit my sister and her family and have my daughter and her family join  us there for a few days before they head home to Long Island!   I can't wait to see these sweet faces .....
Liam

Logan


 How about you .... any plans for a final vacation get-away before school starts up next month?  Be sure to comment below with your exciting plans!

Happy quilting!!!

Patti


Saturday, August 6, 2016

New Pantos Have Arrived!!!!!

I recently received several new pantograph (edge-to-edge) patterns in the mail.  What's even better than receiving these new patterns is getting the chance to stitch them on your quilts!!!!  Take a look at these and maybe you'll find something that will look great on your next project!

 (Note:  Row height measurements are taken from the highest to lowest point of the dark black lines in each pantograph sample pic.)


Anchors Aweigh - Row Height: 7.5" (two rows shown)

Nancy C.'s Pinwheel quilt

Bali - Row Height: 12" (from highest black line point to lowest black line point)

Echo Blossom - Row Height: 11"

Boulevard - Row Height:  5.25" per row (two rows shown)

Cloisonne - Row Height: 8"

Flitter - Row Height:  9"
Laura N.'s Cabin Squares

Hypnotic - Row Height:  14"

Jeffrey's Star - Row Height: 10"

Marigold - Row Height:  11" 

Lorien's Pirouette - Row Height: 13"

Lorien's Splat - Row Height:  15"

Malachite - Row Height:  12"

Mesmerize - Row Height: 8" (two rows shown) - (This is a very dense pattern)

Sparkle - Row Height: 15"

Retro Revolution - Row Height:  10"

Rhythm - Row Height:  10"


Stacked Snailz - Row Height:  15"

(Photo from Urban Elementz website)

Whole Lotta Daisies - Row Height:  12" (Very dense pattern)

Whootie Hoo - Row Height: 10"

Laura N.'s Woodsy Flannel Baby Quilt

Be sure to check out the "Patterns" section on the Quilts from the Trail website (www.quiltsfromthetrail.com) to see more pantograph patterns.

Happy Quilting,

Patti


Sunday, May 22, 2016

Commonly Asked Questions


I get a lot of different questions about longarm machine quilting.  Here are some of the most commonly asked questions by customers:

Should I bring the backing and/or batting?
You definitely want to bring your own backing.  Make sure it is a minimum of 4" wider than the quilt top on each side.  I carry Hobbs Heirloom 80/20 108" batting for about $10/yard.  If you don't have time to pick up your batting, I can do that for you for the cost of the batting plus a $5.00 travel charge.

What kinds of threads can I choose from?
I carry two brands of quilting thread -- Superior Threads and Signature by A&E.  The Superior brand threads are available So Fine! a fine 100% poly thread in a variety of colors.  I also carry King Tut  variegated thread which is 100% Egyptian long staple cotton.  I love this thread because the color changes are quick (about 1" or less) and never looks "choppy".  Signature by A&E is a 100% cotton thread in a large variety of colors.  This thread is a heavier thread and gives a much bolder look when stitched.

Does the bobbin thread have to match the top thread?
Since the machine I used is a heavy industrial machine, it doesn't have the fine tension adjustments your domestic machine.  Because of this, I usually make the threads match.  Should I use, say, white thread in the top thread and black thread in the bobbin, I would end up with white dots on the back or black dots on the front.  If you really want a different color of thread in the bobbin, I would strongly recommend you use a busy print fabric for your backing where the dots wouldn't show.  With the King Tut variegated thread, I always use a solid color thread which coordinates with the thread and backing.

Do you charge for thread changes?
Yes -- I do.  I have quilted many t-shirt quilts over the years where the client has requested I match the color of thread to each fabric.  I've had some quilts that used more than 15 different colors of thread which means a lot of stopping to change thread on the backside of my machine.  I charge $5 for your first thread and $1 for each additional color.  Variegated thread is $10 as it is a bit more costly than the solids.


Do you have a computerized machine?
At this time, no.... I don't have a computerized system.  My machine is completely hand-guided, meaning I "draw" every line, loop and curve.  When it comes to straight lines, they are the hardest things to do on a free-hand machine.  So, when you ask me to "just stitch-in-the-ditch on the whole thing" be sure that is what you really want.  Like cross-hatching, stitch-in-the-ditch (SID) is considered advanced custom quilting and will bring the cost up for quilting.


Will puffy/full areas quilt out?
Whether the puffy/full areas will "quilt out" totally depends on how you want your project quilted.  If you have wavy borders, a meandering pattern will usually take care of easing in the fullness.  If the puffy/full areas are in the center of a block or over the majority of the quilt "body", the quilt will benefit from an all over meandering design.  Too much volume can result in creases as the quilt is stitched.
 

Do you do bindings?
 Yes - although it's not my favorite thing to do.  I can either machine stitch your binding to just the front of the quilt and you can then stitch it to the back; or, I can machine stitch to the front and hand stitch to the back.  If I need to make your binding from yardage or strips that you provide, there will be an additional charge.  Please see my website for pricing information.  I like to encourage my clients to do their own binding.  Here is a great YouTube video Missouri Star Quilt Company showing how to do your binding. 

What is the most common mistake you find?
Borders!  Wavy borders!  The best way to get a flat border?  Measure!!!!  I like to measure down the center lengthwise for side borders.  Once the side borders are sewn in place, measure across the center for your top and bottom borders.  PIN your borders in place and sew with whichever side has the most fullness on the BOTTOM (touching the feed dogs) to allow your machine to ease any fullness as the seam is being stitched.   Here is a great YouTube video from National Quilters Circle showing how to cut and sew your bindings.

Are there any other questions you might have about longarm machine quilting?  Leave your question in the comments section below.

Happy Quilting,

Patti


Sunday, May 15, 2016

Decorating with Quilts

So many quilts ... and not enough beds!!!  That's what some might consider a "problem" with making too many quilts.  But then, you can never have enough quilts, right?

Here a few ideas on how you can use your finished quilts other than putting them on your bed...

Now THAT's a quilt rack!!!! 
 Source: Quilters Club of America

Little quilts can be framed and hung on the wall or propped on a fireplace mantel
 Source:  Martingale/That Patchwork Place


Drape a quilt across a chair back .... or for an even more dramatic effect .... hang it from the ceiling!!!
 Source:  Better Homes and Gardens


How about a shower curtain?  Use cafe rings to clip onto the quilt.
 Source:  Martingale/That Patchwork Place


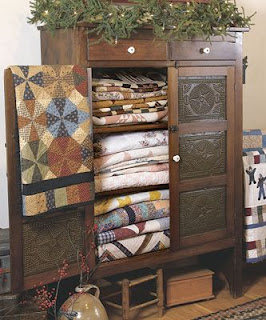
Folded up and displayed in an antique cabinet


Source:  Country Sampler Magazine

Want more ideas?  Check out the Quilts from the Trail Pinterest board HERE!

What is YOUR favorite way to display quilts?  Share below in the comments!   I would love to hear from you!!!!

Happy Quilting,

Patti

Thursday, May 12, 2016

Don't want to miss out on our blog updates?

Be sure to sign up and receive notification of updates to the Quilts from the Trail blog.

If you have a Google account (@yahoo.com or @gmail.com), you can "Join the Site" by clicking the icon at the right of this page.

Don't have a Google account, enter your email in the "Follow by Email" box also to the right of this page.

Happy Quilting,

Patti

Wednesday, May 11, 2016

Did you know Quilts from the Trail has an Etsy shop?


That's right ... Quilts from the Trail has an Etsy shop called, Treasures from the Trail!   Over the last couple of years, I have been selling some of my handcrafted treasures at a local resale shop.  I decided to open an Etsy shop as another avenue to sell these items. In the shop you will find finished quilts, machine embroidered flour-sack and homespun towels, handcrafted jewelry and more!

Here's just a small sample of the towels currently available:


One of my favorite types of jewelry I like to make uses hand-rolled paper beads.  I personally make these beads recycling various kinds of paper --- scrapbook paper, catalogs, magazines, junk mail, wrapping paper, etc.  Each bead is hand brushed with an acrylic coating making the bead very shiny and durable.

Bracelet and earrings contain beads from  vintage jewelry


 Striped scrapbook paper

Pearlized scrapbook paper
Mottled scrapbook paper

Paper was recycled from an old calendar

Scrapbook paper

Glass tile pendant on silver-toned ball chain

Glass tile pendant in silver toned tray and ball chain
This is just a small sampling of what is in the shop AND more items are added weekly.

I would love for you to visit Treasures from the Trail and take a few minutes to shop.  Many of these items would make a great gift for someone special (including YOU!).


Click HERE to visit the shop!

Happy Quilting!!!

Patti

Friday, January 15, 2016

Choosing Your Batting


Once you’ve finished piecing your top, it’s time to choose your batting.

There are many brands and types of batting available – from natural fibers like cotton and wool to synthetic and man-made fibers.

You will need to consider the following when choosing your batting:

·         How will the quilt be used?  Will it be a show quilt? Wall hanging? Baby or child’s quilt – does it need to be fire-retardant?  Does the family have pets?  Will it be used as home décor or will someone actually “use” it?

·         How often will it be laundered?  A quilt that will be “used” will most likely be laundered frequently.

·         What kind of look do I want?   Puffy?  Drapy vs stiff?

·         What is my preference for fiber?  Cotton? Poly? Wool? 

·         How warm do I want my quilt to be?

·         Do I have price concerns? How much do I want to spend on batting?

Cotton and Cotton Blends:                            
  •  Cotton batting is a low-loft batting – when washed and dried, your quilt will take on the soft, vintage look of traditional quilts. 
  •  All around good choice for many quilts
  • Cotton “breathes” – keeping you warm in the winter and cool in the summer
  • Cotton batting can be heavy
Polyester:
  • Available in various lofts
  • Less expensive than cotton
  • Lighter weight than cotton
  •  Doesn’t “breathe” like cotton
  •  Prone to bearding and pilling (coming through to top or back of quilt)
  • May compress or flatten over time
  •  May melt or flatten if ironed too hot
Wool:
  • Warm and breathable; retains warmth even if damp
  • Light weight
  • Adds puffiness/texture
  • Good choice for show quilts as it easily releases wrinkles
  • More expensive batting
  • As with all wool, may attract moths so you will need to store appropriately
 Other batting choices include:
  •  Flame-retardant battings – great for baby or children’s quilts (Brands include Dream Angel by Quilter’s Dream Batting and Warm and Safe by Warm and Company)
  • Eco-friendly battings – bamboo and recycled (Brands include Quilter’s Dream Green [made from recycled bottles], Hobbs Kyoto Bamboo Blend, Soy Soft by Moda Fabrics)
  • Flannel can also be used as a “batting” for a lighter, flatter quilt
Loft:
Some batting brands are available in different lofts.  Each will give a different look to your finished quilt.

Low Loft:
  •  Easily needled for hand quilting
  •  Soft and drapable
  • Resembles soft vintage quilts
  • When hand-quilting – achieve small even stitches
Medium Loft:
  • Adds texture to finished quilt
  • Puffier look
  • Warmer than low loft but not as soft/drapy if quilted too closely
High Loft:
  • Good for highlighting detailed quilting
  • Lots of texture to quilting
  • Warmest of lofts
  • Used primarily for comforters, bedspreads or tied quilts
  • Stays soft and drapable with very open or light quilting
Packaged batting should be removed from the packaging and allowed to “breathe”  before using it in your quilt.  The easiest way to do this is to let it lay flat overnight.  This gives it time to “breathe” as well was relax any folds or wrinkles.  Depending on the fiber content of your batting, you can also toss the batting in a dryer for a few minutes.  Read the label for the manufacturer’s suggestions on drying.  Use a “no heat” setting for about 15-20 minutes.  Removing the batting from the packaging also allows you to check for “thin spots” in the batting.  If you take your batting out and see thin spots, put it back in the package and return it to the store where it was purchased.  

My personal favorites:
·         Quilter’s Dream battings!!!!  They are consistent in their quality and quilt “like buttah”!  Available at local quilt shops.

·        Warm and Natural, Warm and White from The Warm Company.  Available at local quilt shops as well as Joann’s.

·         Nature’s Touch 100% Cotton Batting by Pellon.  Available at Joann’s.

If you have any questions about batting, please feel free to contact me.

Happy Quilting,

Patti

Friday, January 8, 2016

Choosing Your Quilt Backing


We spend so much time choosing the perfect, quality  fabrics for our quilt tops; but when it comes to the backing we don’t make such careful decisions.   Some quilters will purchase inexpensive, low quality fabrics for the backings thinking, “It’s just the back … it’s no big deal!”  However, you need to keep in mind that the inexpensive fabric is not necessarily the same quality as the more expensive, quilt shop fabric.  You want a quality, strong fabric that will add years of wear to your finished quilt. 
You’ll also want to consider the following when choosing your backing:

Fiber Content
  • 100% cotton is most often preferred choice
  • Use the same fiber as what was used in the top so your fabrics will wear evenly.
  • Stretchy fabrics (i.e., Minkee or fleece) work well for a backing; however, using these fabrics could increase the chances of tucks and puckering during quilting

Print or Solid?
Prints:
  • Pro: Print fabrics will hide any “starts and stops” (backstitching) or heavy thread play in the quilting
  • Pro:  If you have multiple thread colors being used in the top and you don’t want to see them on the back, a print fabric will camouflage the color changes.
  • Con:  Quilting will not be as noticeable

Solids:
  • Pro: Solid fabrics will “showcase” the quilting and make your quilt “reversible”
  • Con:  Unlike a print fabric, the solid will show every “start and stop” (backstitching) or heavy thread play in the quilting.
  • Con: If you have multiple thread colors being used in the top, the color changes on the back may not be as attractive.

Calculating Yardage:
Calculating the amount of yardage needed for your backing can be overwhelming.  Your backing needs to be at a minimum 6-8” larger than your quilt top.  For example, if your quilt top measures 50” x 60”, your backing needs to be at least 58” x 68”.  Using these numbers, we can now determine the yardage needed.

Option 1 – Extra Wide Backing (108” wide)
An extra wide backing would not need to be seamed.  You would purchase your yardage based on the width of your fabric, so you would  only need  58” (or about 1 1/3 yards of fabric).

Option 2 – Seaming Your Backing (42/44” wide)
When seaming your backing, you need to determine which direction you want your seam to run – horizontally (the width of your quilt) or vertically (the length of your quilt).   Because of how the backing is loaded onto the rollers of the quilt frame, some pantograph patterns will only work on backings that have been seamed horizontally.  Pantograph patterns which work best with horizontally seamed backs will have a notation stating such.

Once you’ve established how you want your seam(s) to run on your backing, you need to determine yardage.   For our example, I am going to seam my backing horizontally and the fabric I have chosen is about 40” wide.  In order to have enough fabric for the 68” in length, I’ll need two strips of fabric that are 58” x 40”.  So, 2 x 58” = 116” or 3 ¼ yards of fabric.

When seaming your backing, it is really important to remove the selvages before you stitch your seam.  The selvage edges are woven tighter than the rest of the fabric and can cause puckering in your backing.  I also recommend using a ½” seam.

Seam placement is also something you need to take into consideration.  Most quilters will take their backing yardage, cut it into two or three equal lengths and widths and sew the seams together.  You don’t want to center your seams to the quilt top, as your seams are going to be the weakest point on your backing.  When folding your quilt, you don’t want any of your seams to end up on a fold as the constant folding and unfolding can cause stress on those seams and end up breaking the threads. 
So rather than seaming your backing with your seam going across the center…


…consider seaming your backing dividing “B” in half and sewing the two pieces on either side of “A”
Your backing will still be the width and length you need but the seams are now located where they are less likely to be on a fold line.

 If at all possible, you want to avoid backings that are pieced like this . . .


You want to try to keep all of your seams going in the same direction.  The backing is attached to the leaders on the take up rollers so that the seams run parallel to the rollers.  As the backing is rolled up, the seam will have more tension on it than the sides, causing the sides of the backing to sag.  The vertical seam in the example above could cause potential tucks or pleats in the quilting.  
 
Once you have seamed your backing, press your seams well.  You can press the seam open or to one side.  Be sure to press your backing to remove any set-in creases as well.  Fold carefully to minimize wrinkling.

If you have any questions about backings, please feel free to contact me with any questions.

One last tip about backings … if you have a quilt that has long straight strips in the body of the quilt, consider seaming your backing in the same direction as the strips.  This will allow the quilt top to be mounted in a way so that the strips on the quilt top can be quilted in a single pass without multiple stops and starts.


Happy Quilting,

Patti